


Introduction
Fluent SMTP is a WordPress plugin that aims at delivering your WordPress emails securely and as fast as possible. It does this by connecting your WordPress mail with your Email Service Provider (ESP).
You can add multiple SMTP connections for transactional and marketing emails. In other words, you can connect to as many Email Service Providers as you want. It is 100% free and open source.
Let's look at how you can connect Zoho, a popular Email Service Provider, to Fluent SMTP in your WordPress site for secure and fast email delivery.
Installing FluentSMTP on your WordPress Site
Go to your WordPress dashboard, and click on plugins > Add New, type FluentSMTP in the search bar. From the search results, you will see FluentSMTP.

Click Install Now, and then Activate. Once done, the plugin will successfully install on your site.
Now go to Settings and click on FluentSMTP to begin the set up.

Note:
Before clicking install, you can click on more details to view more information about the plugin and its compatibility with your site's WordPress version.
The plugin's current version requires WordPress version 5.5 or higher.
Connecting Zoho to Fluent SMTP
After clicking on the plugin, the FluentSMTP layout below will be shown ↓
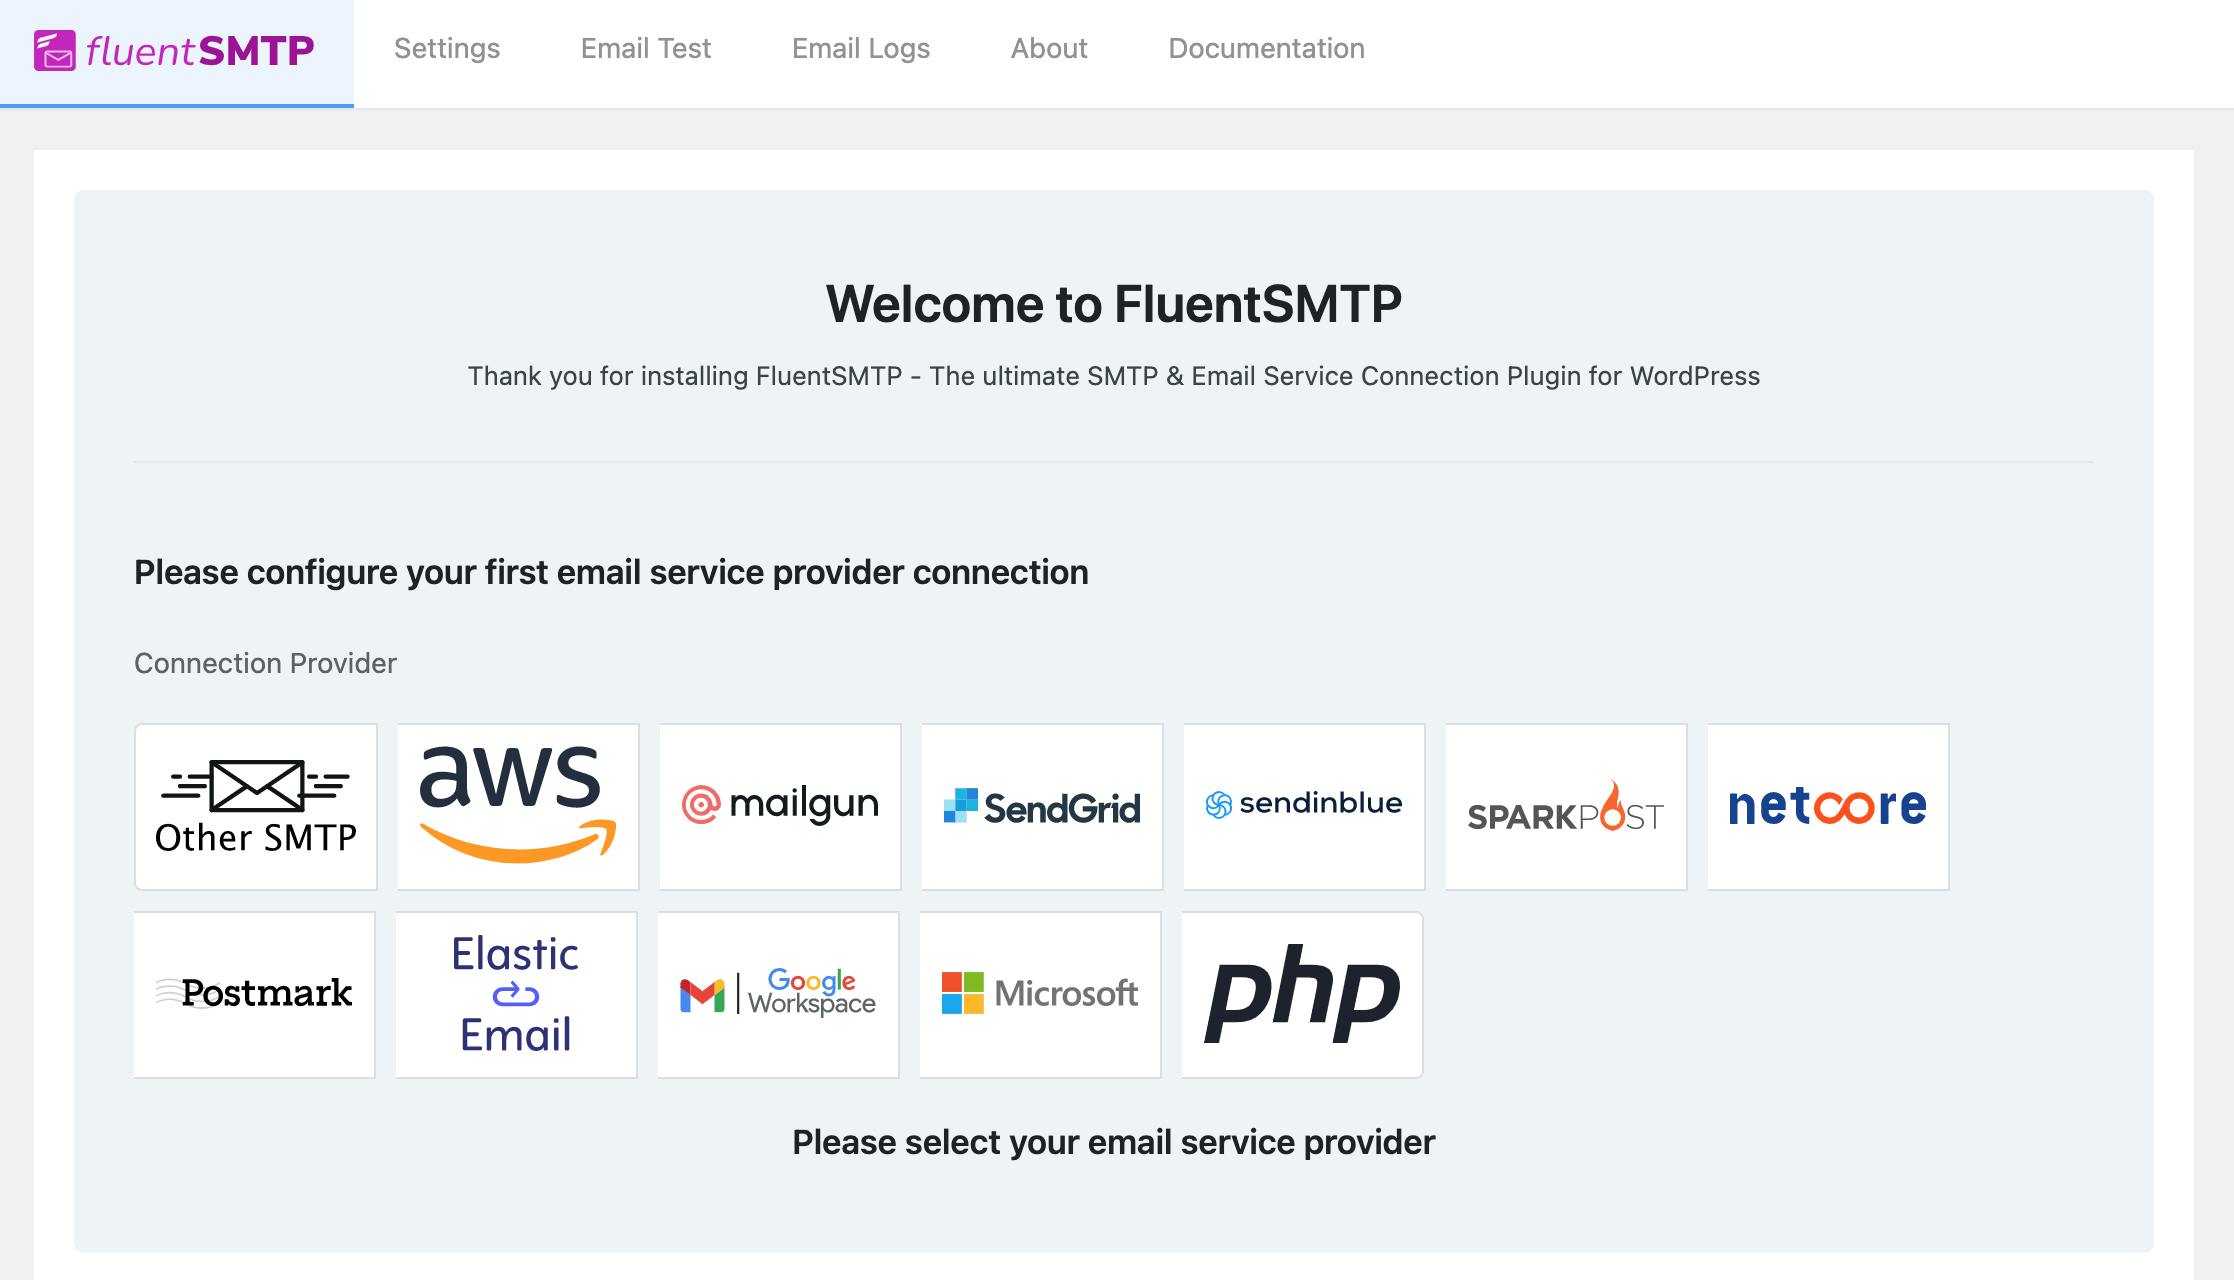
When you reach this stage, you will see the Email Service Providers you can connect with FluentSMTP. However, you will also notice that there is no option for Zoho.
But no need to worry! Just click on Other SMTP to get started with your Zoho setup.
The layout below will be shown to you ↓
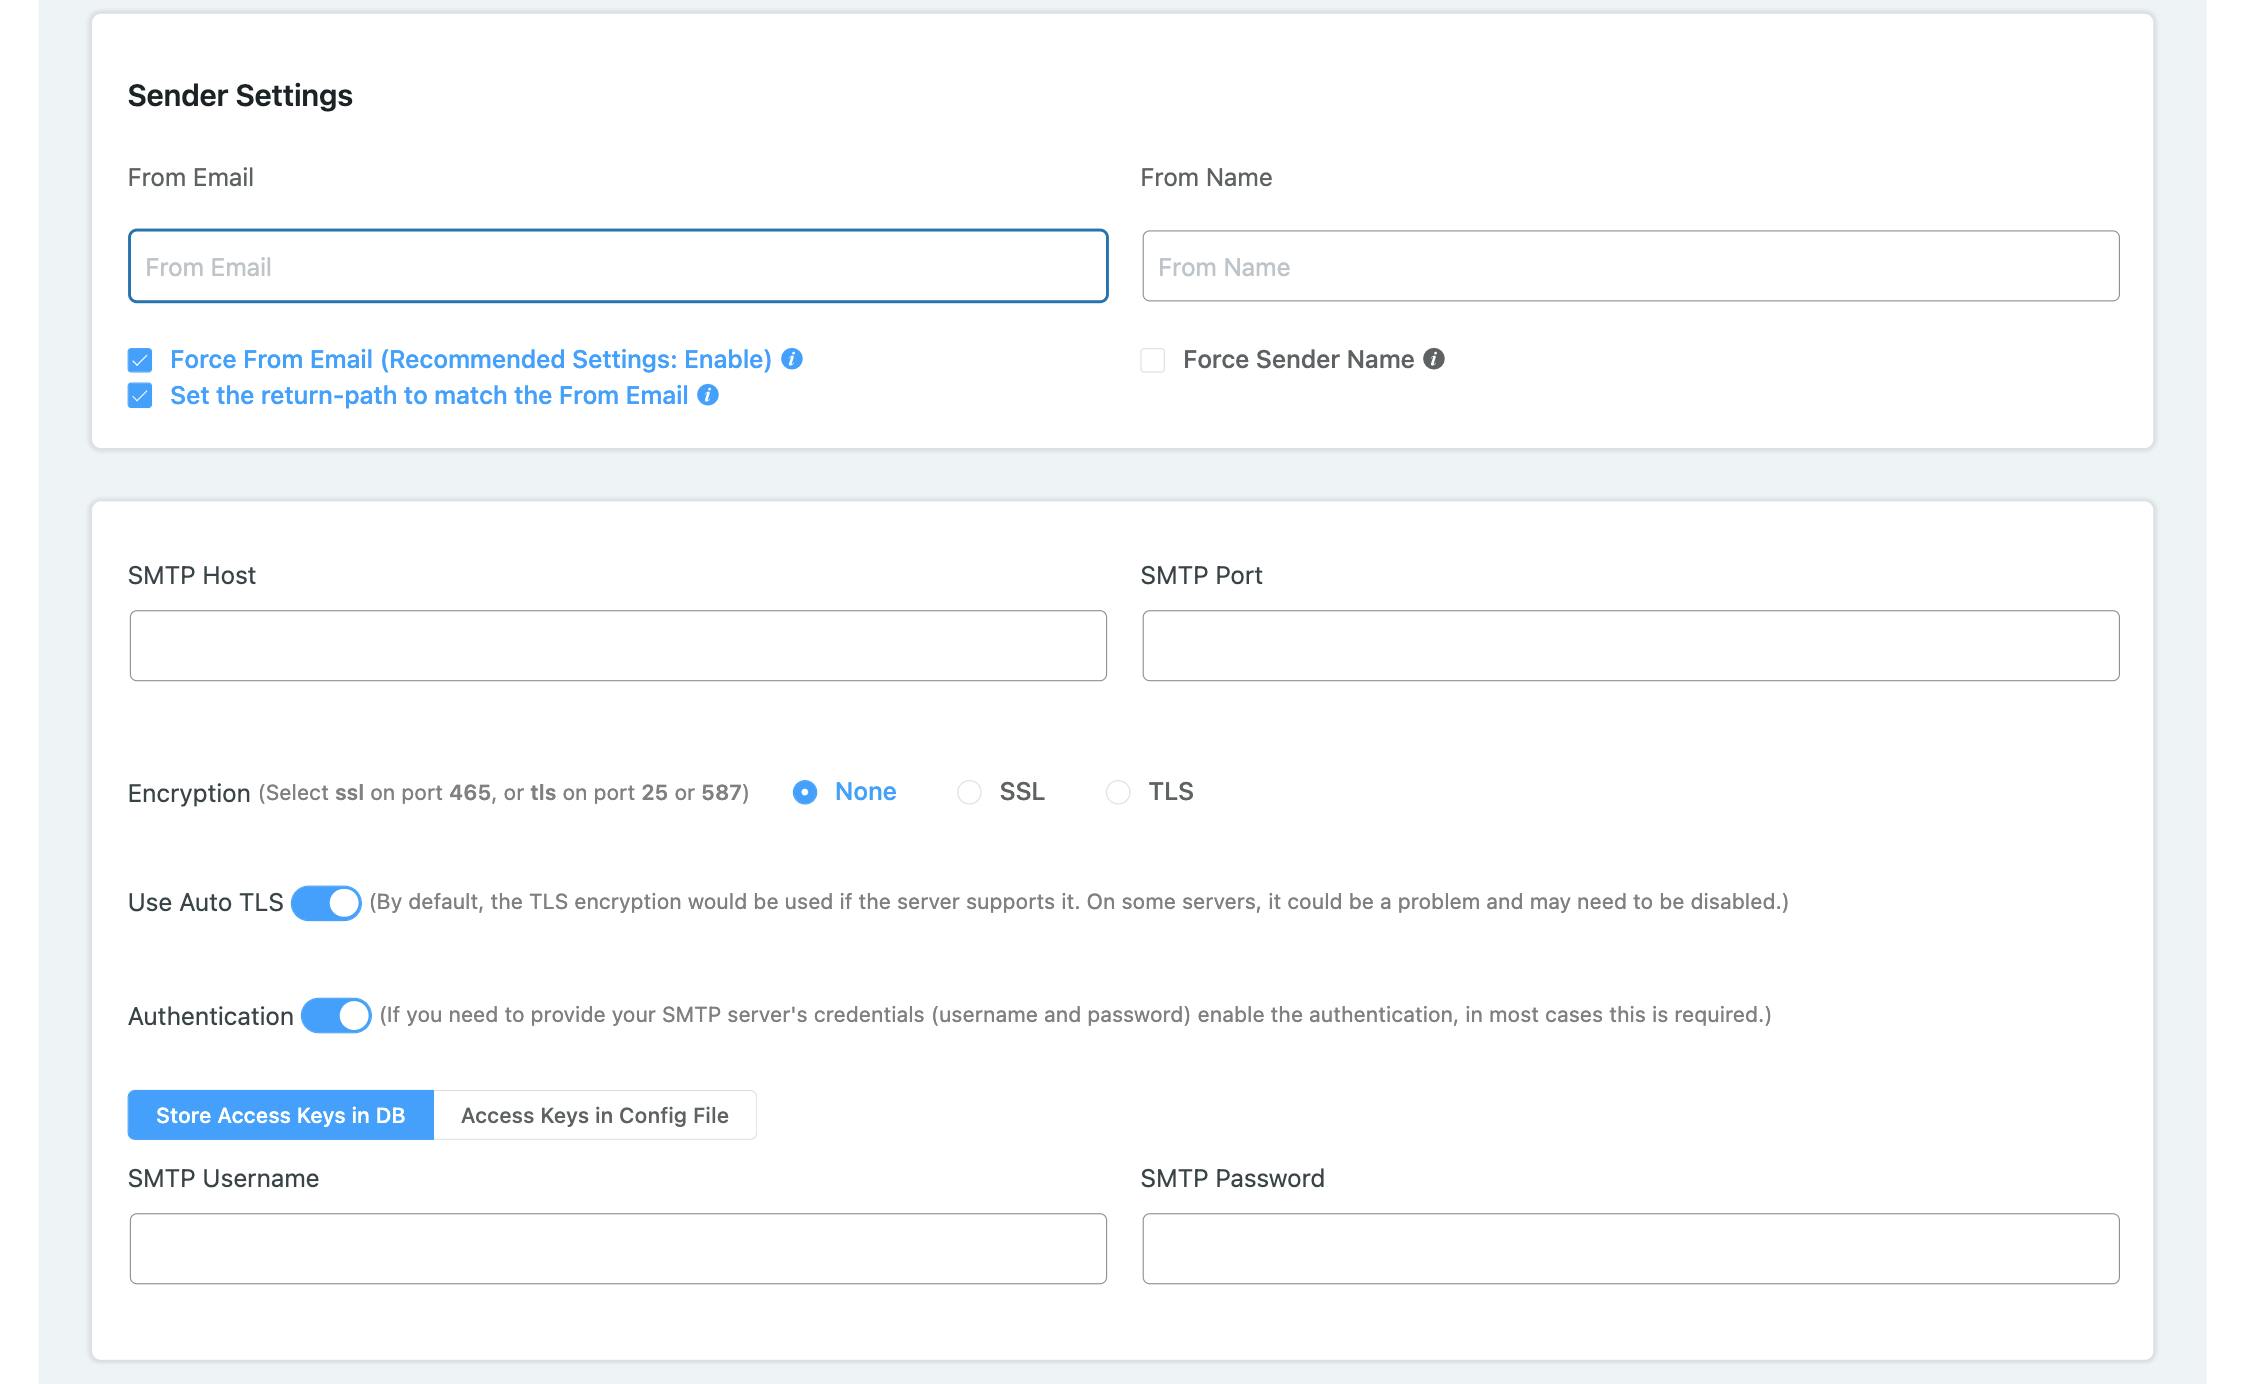
The layout contains two sections. One section is for Sender Settings, and the other for SMTP Settings. Start filling in the fields as per their requirements. Enter the From Email and From Name and proceed to the following fields.
SMTP Host: The SMTP Host address for Zoho. Here it will be smtp.zoho.com.
SMTP Port: The SMTP Port will depend if you have chosen either SSL (Secure Sockets Layer) or TLS (Transport Layer Security).
For SSL, the SMTP Port is 465, and for TLS, 587.
SMTP Username: The SMTP Username is usually the same as your From Email (the email address you use to send emails).
SMTP Password: When it comes to the SMTP password, it used to be the same password as the email account. However, for security reasons, Zoho opted for application-specific passwords.
Application-specific passwords
You now have to use an application-specific password, defined by Zoho as "a 12-character passcode that gives an app permission to access your Zoho Mail from various email clients."
You can read more about application-specific passwords on Zoho's website here.
The security reason given by Zoho on their website for opting for application-specific passwords is, I quote "Even if the email account is comprised, you can still protect your Zoho account by revoking the application-specific password you generated for the email account.", which I personally think is a good thing.
You can read more on that here.
Most current documentation on setting up FluentSMTP with Zoho or any other Email Service Provider lacks any mention of application-specific passwords. This gave us quite a headache at first as me and a colleague of mine were setting up FluentSMTP with Zoho for the first time, and the credentials were being rejected.
Creating an application-specific password
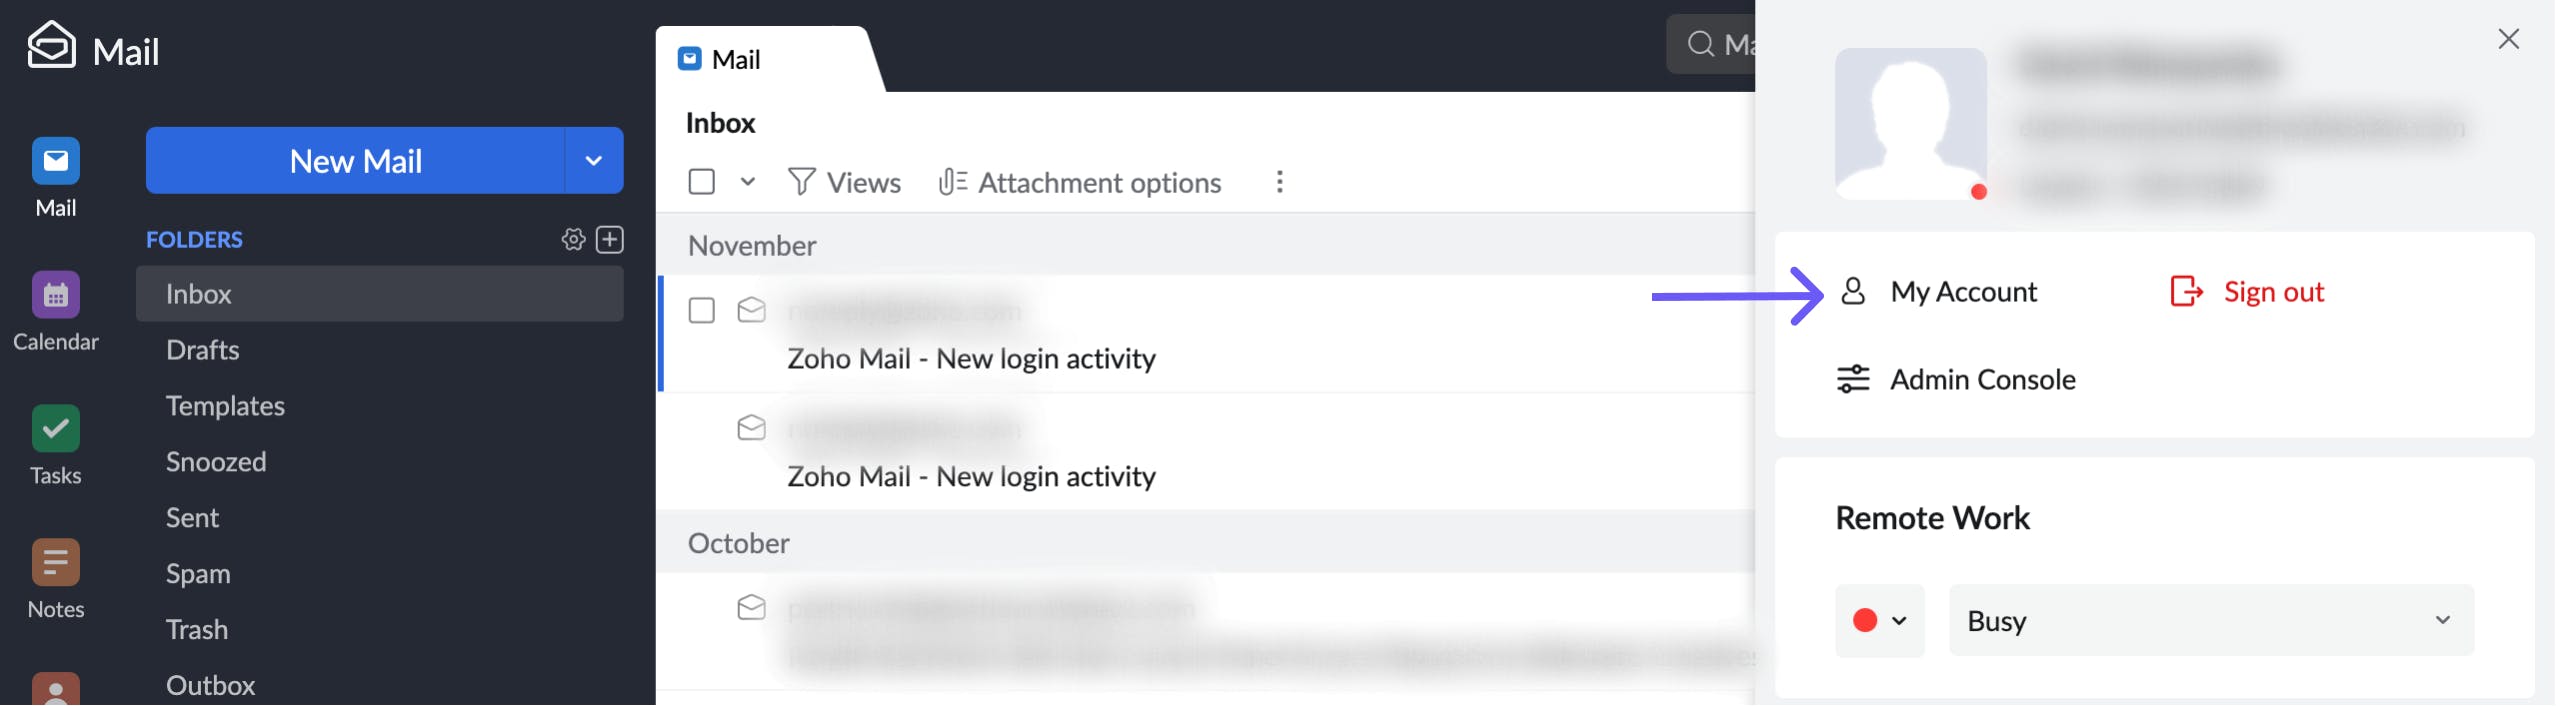
To create an application-specific password, Login to your Zoho email account, click on your Profile image > My Account
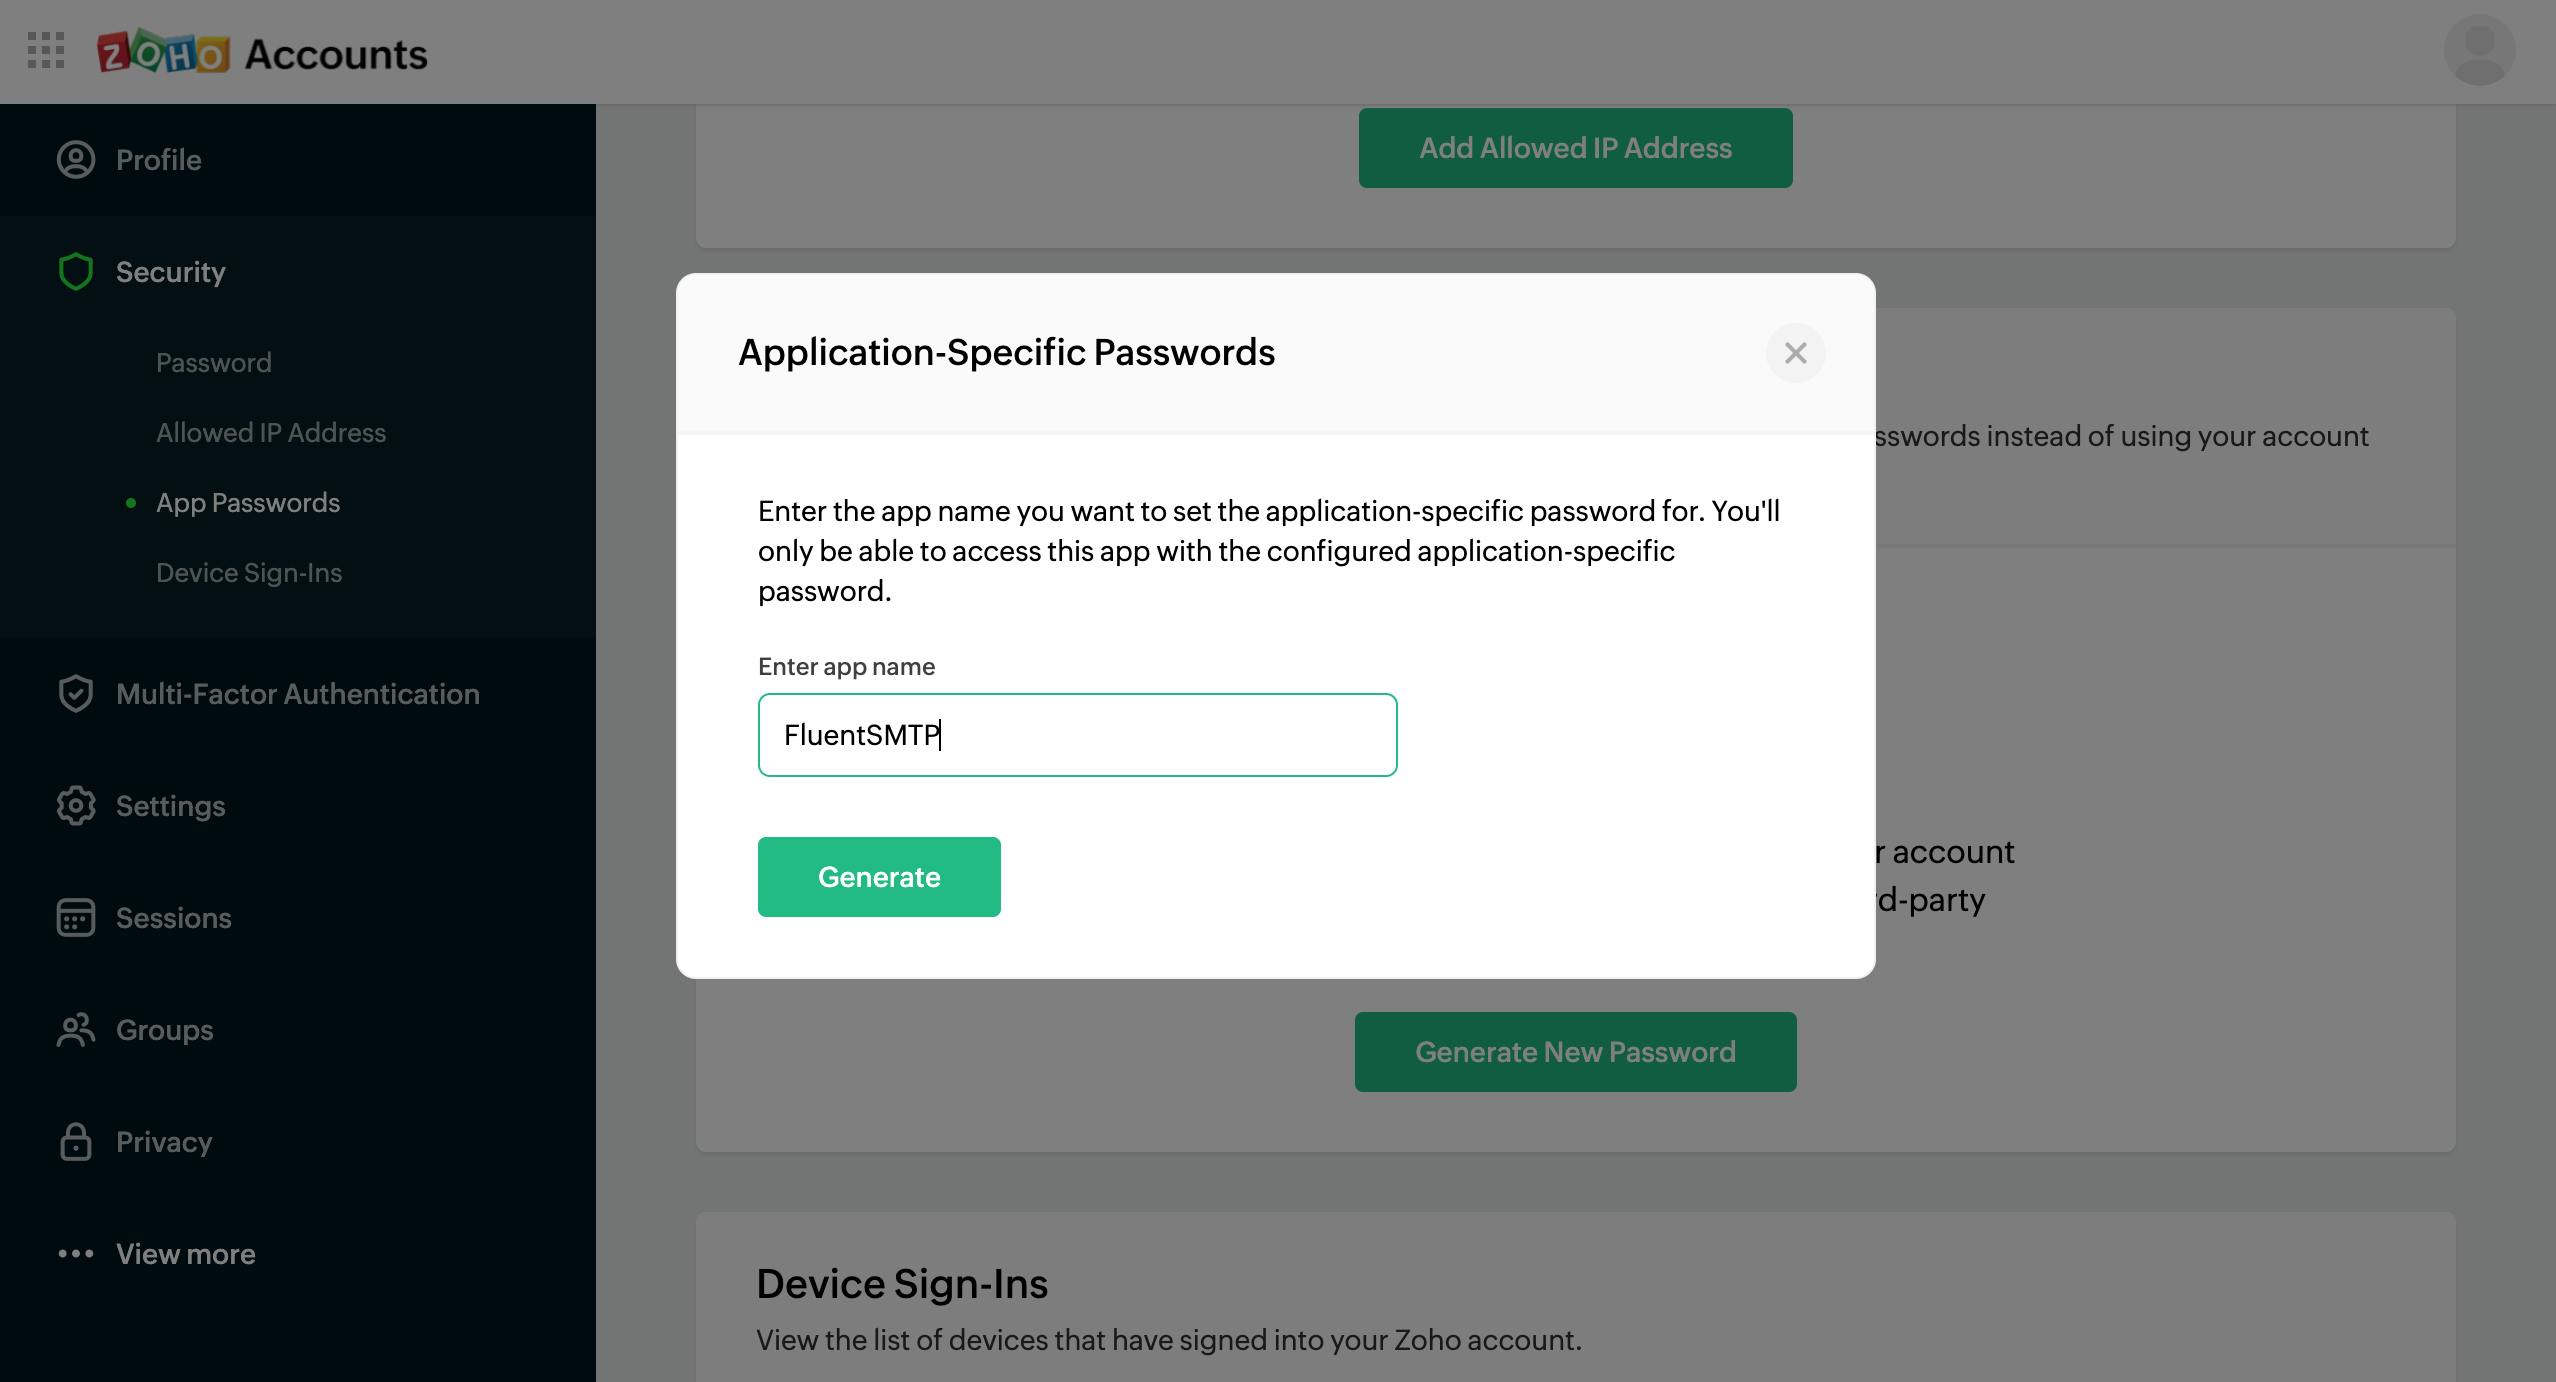
After clicking My Account, the My Account layout is shown. On the side panel, navigate to Security > App passwords and then scroll to the section of Application-Specific Passwords.
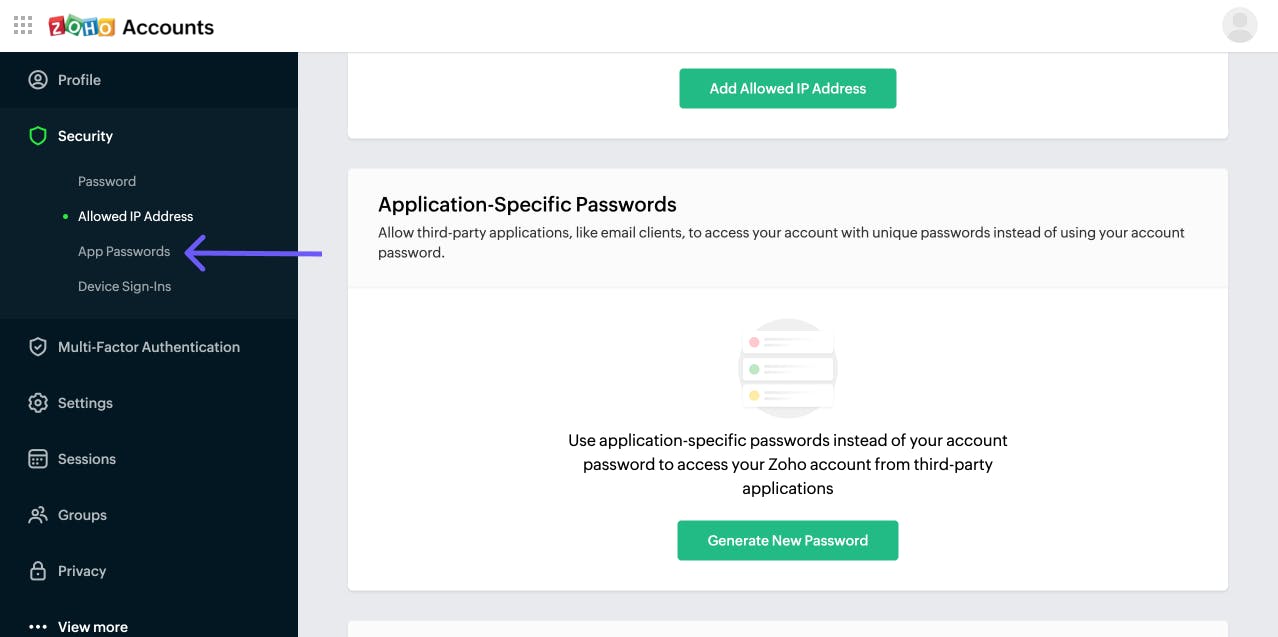
Click Generate New Password to create a new password, enter the app name you are setting the application-specific password for, and then click Generate.
You will be asked to confirm your action by entering your email password, then click Generate again.
Note: This is the password that you are going to use as your SMTP password.
Copy the generated password, and paste it as your SMTP password in FluentSMTP on your WordPress site.
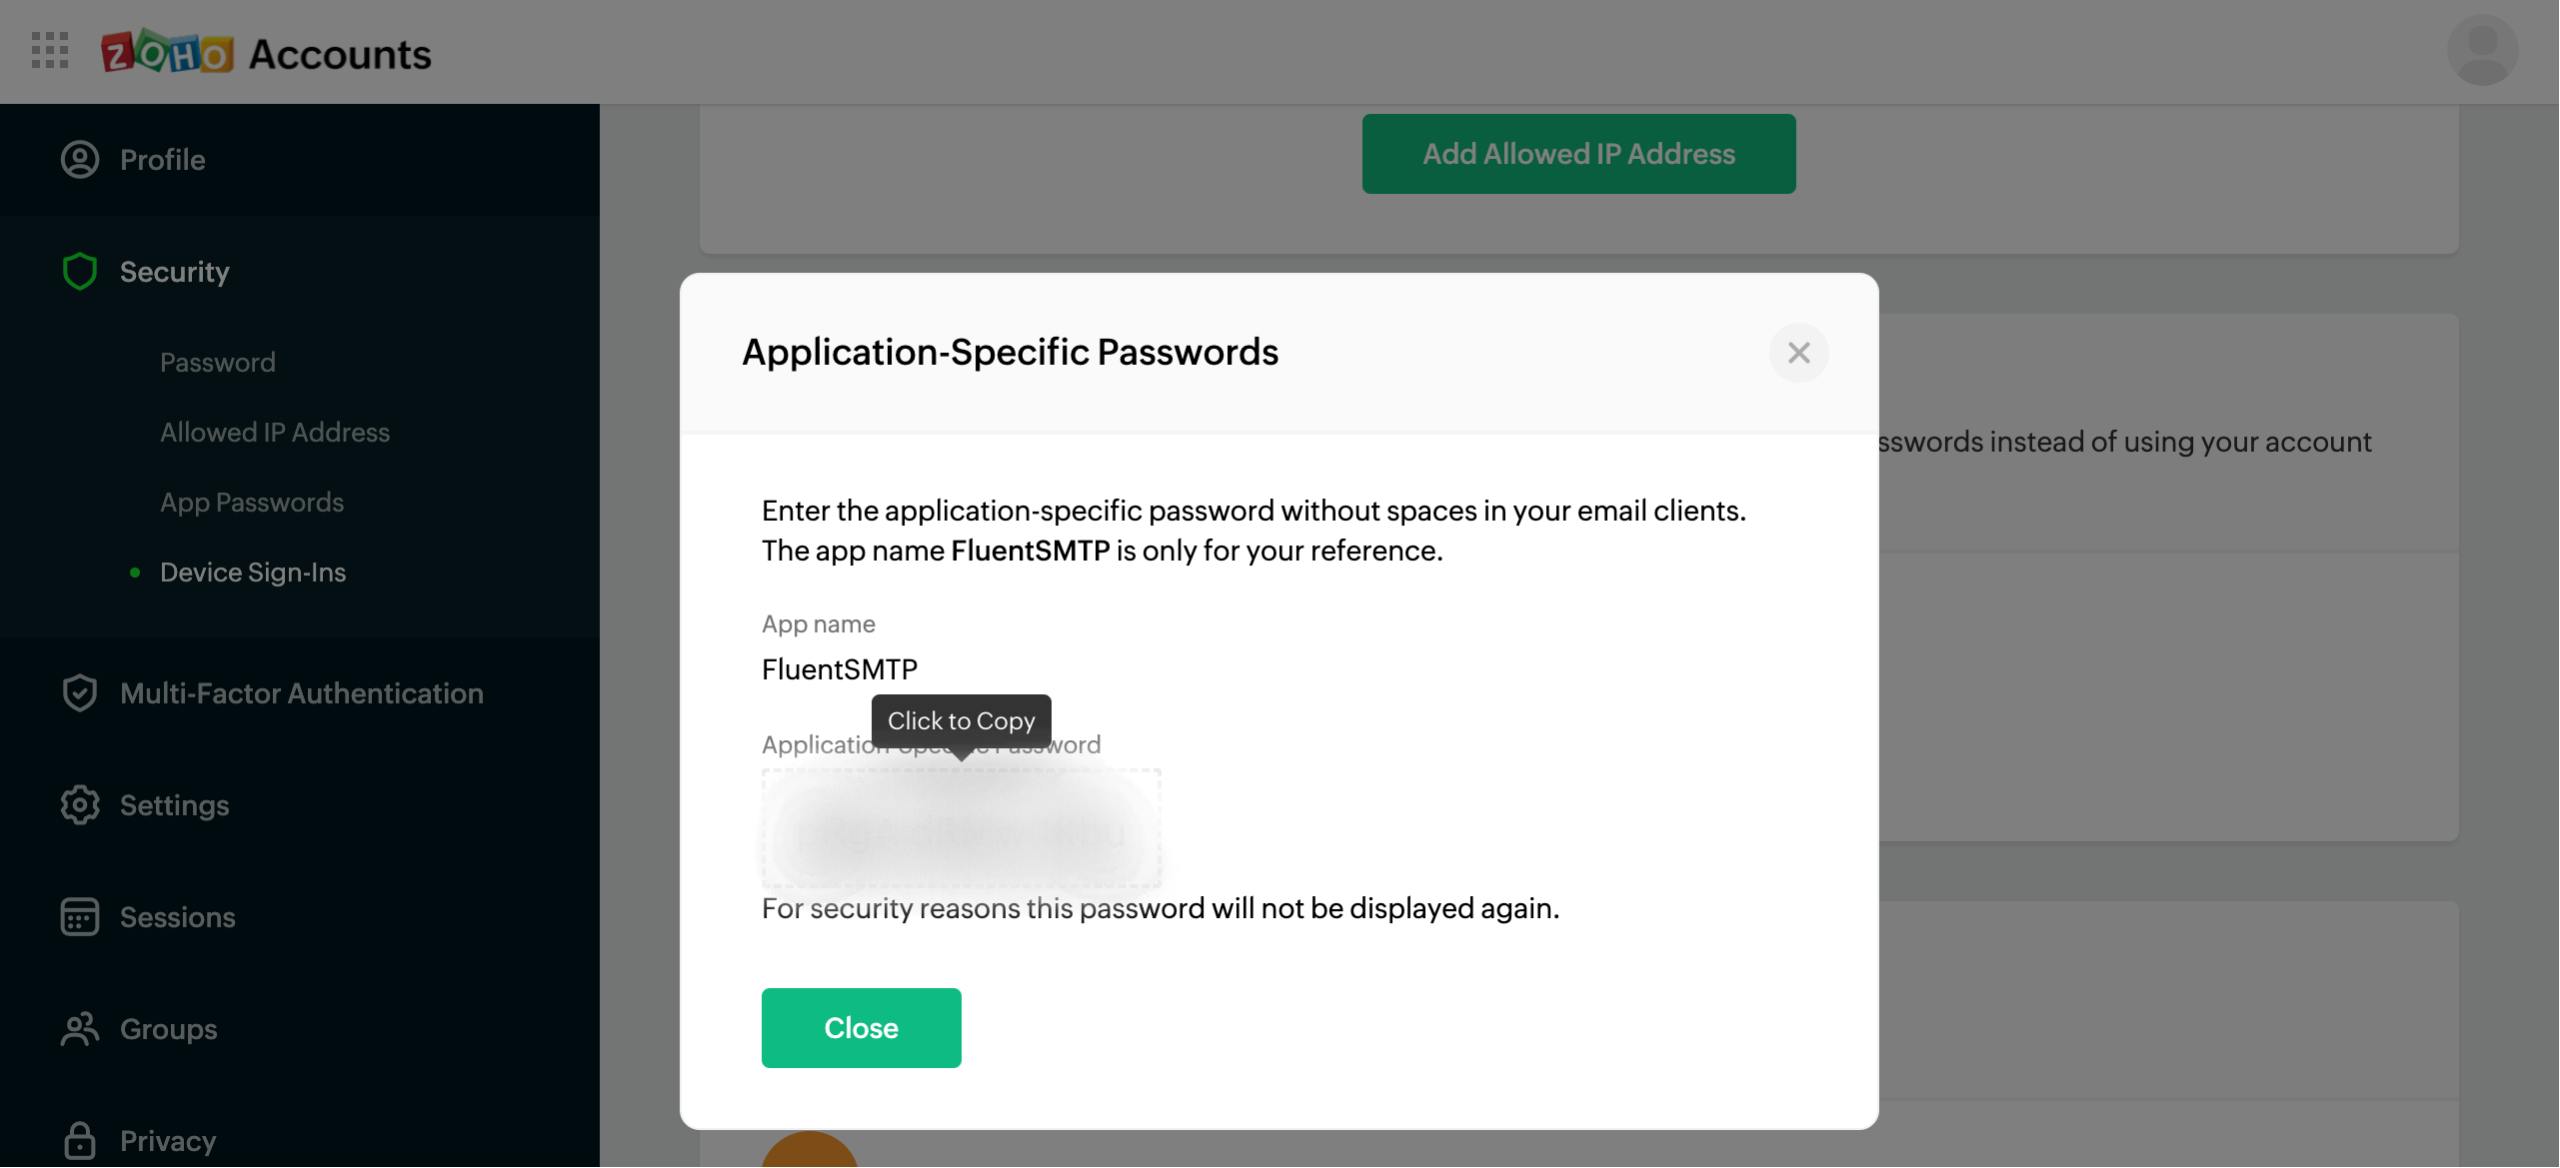
Note:
Make sure to copy the generated password before closing the Application-Specific Passwords modal as you won't be able to view it again once you close the modal.
The only alternative will be creating another application-specific password.
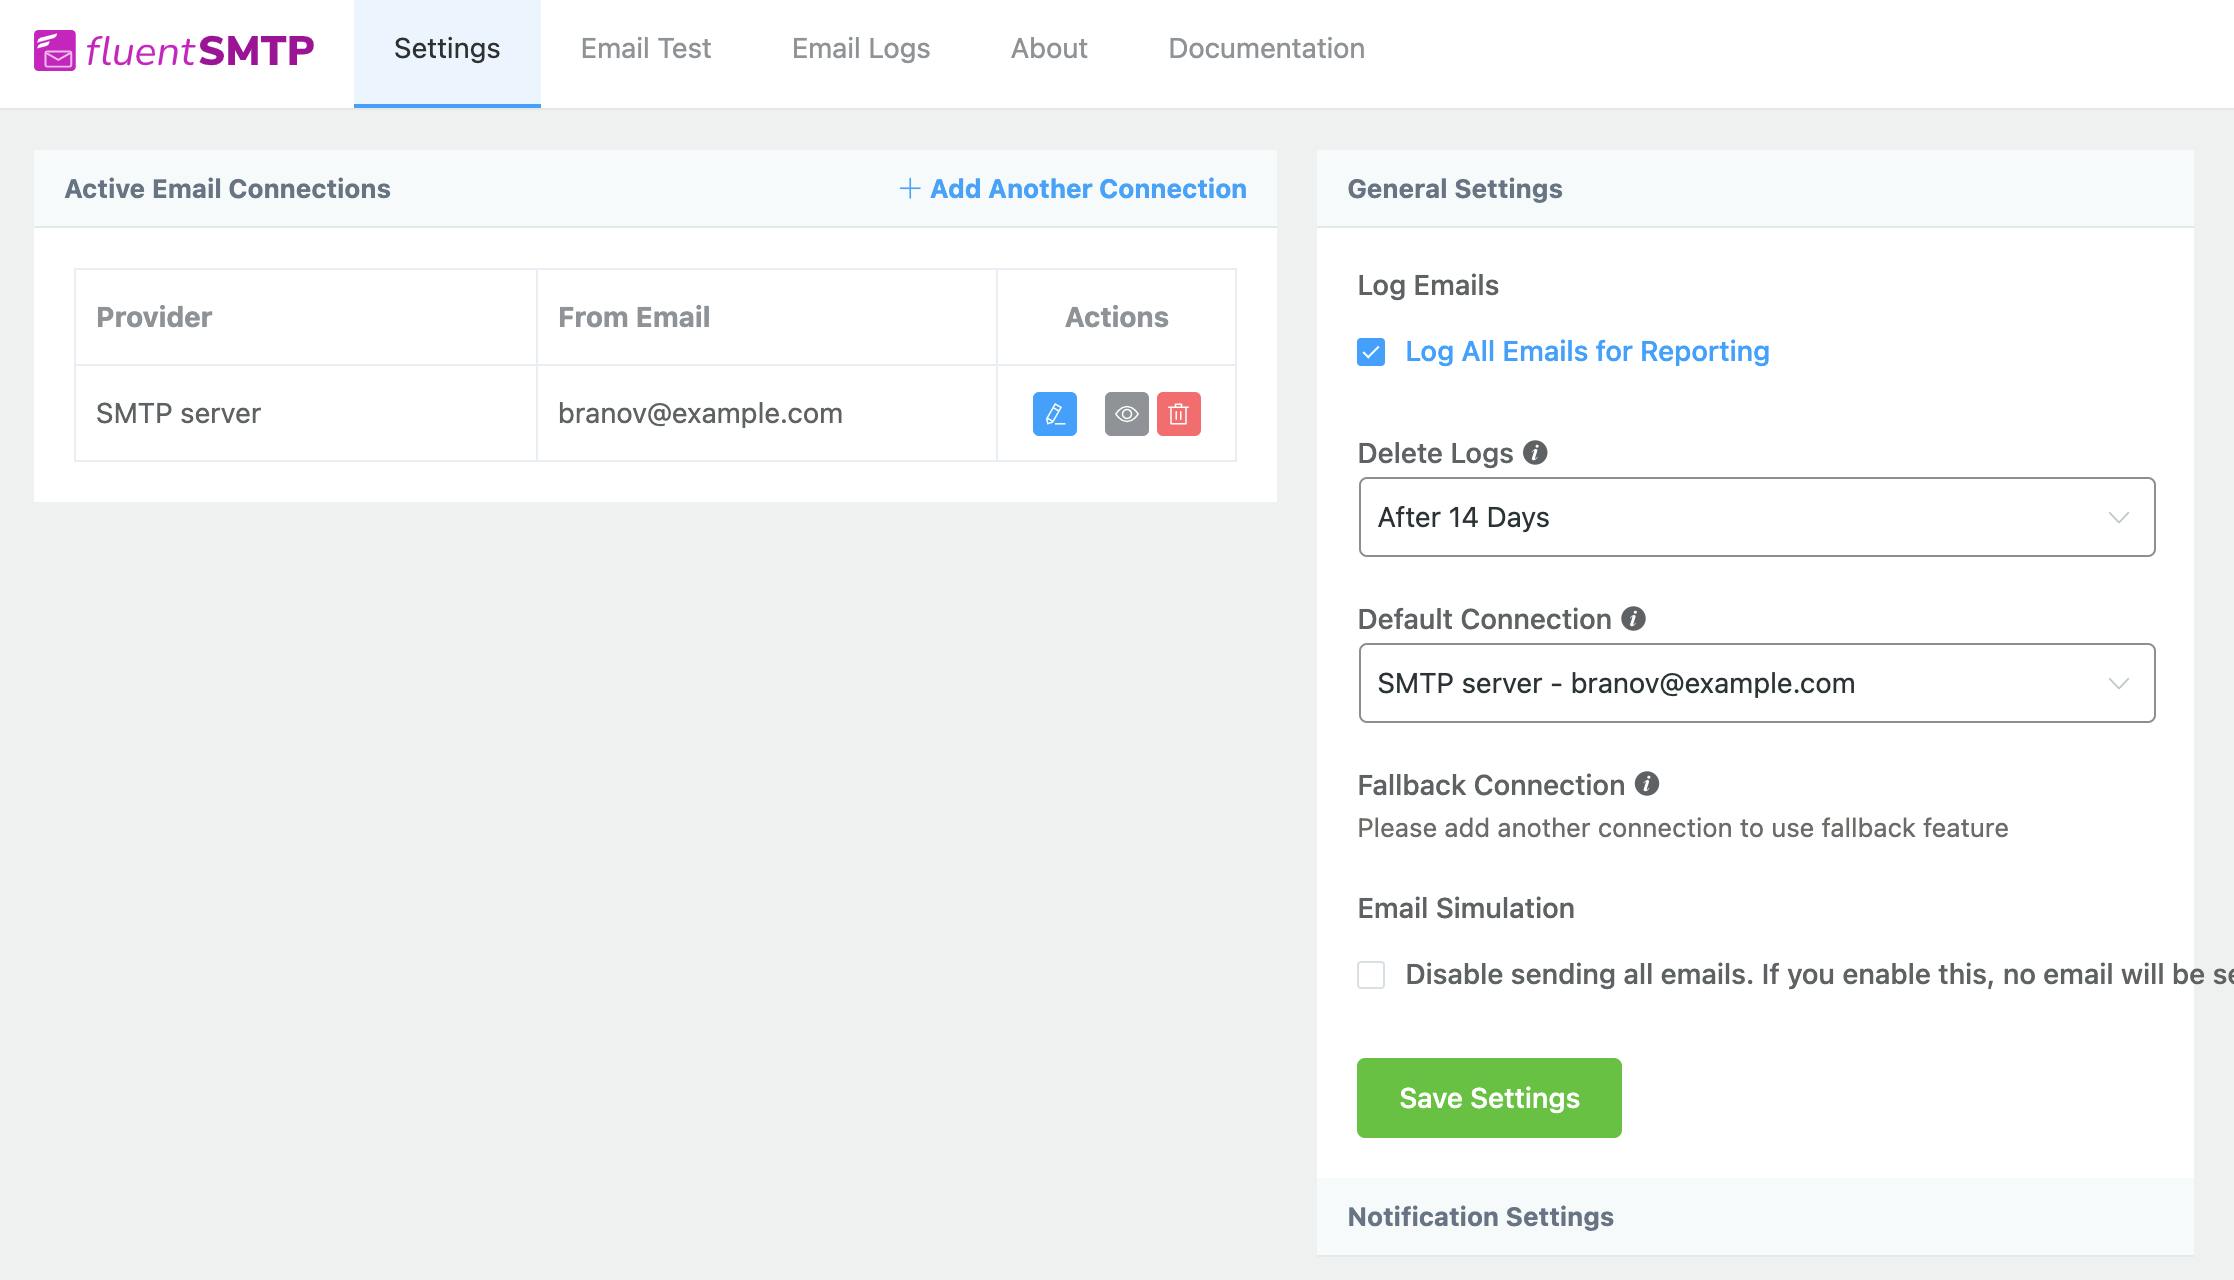
After filling in all the fields, click Save Connection Settings at the bottom.
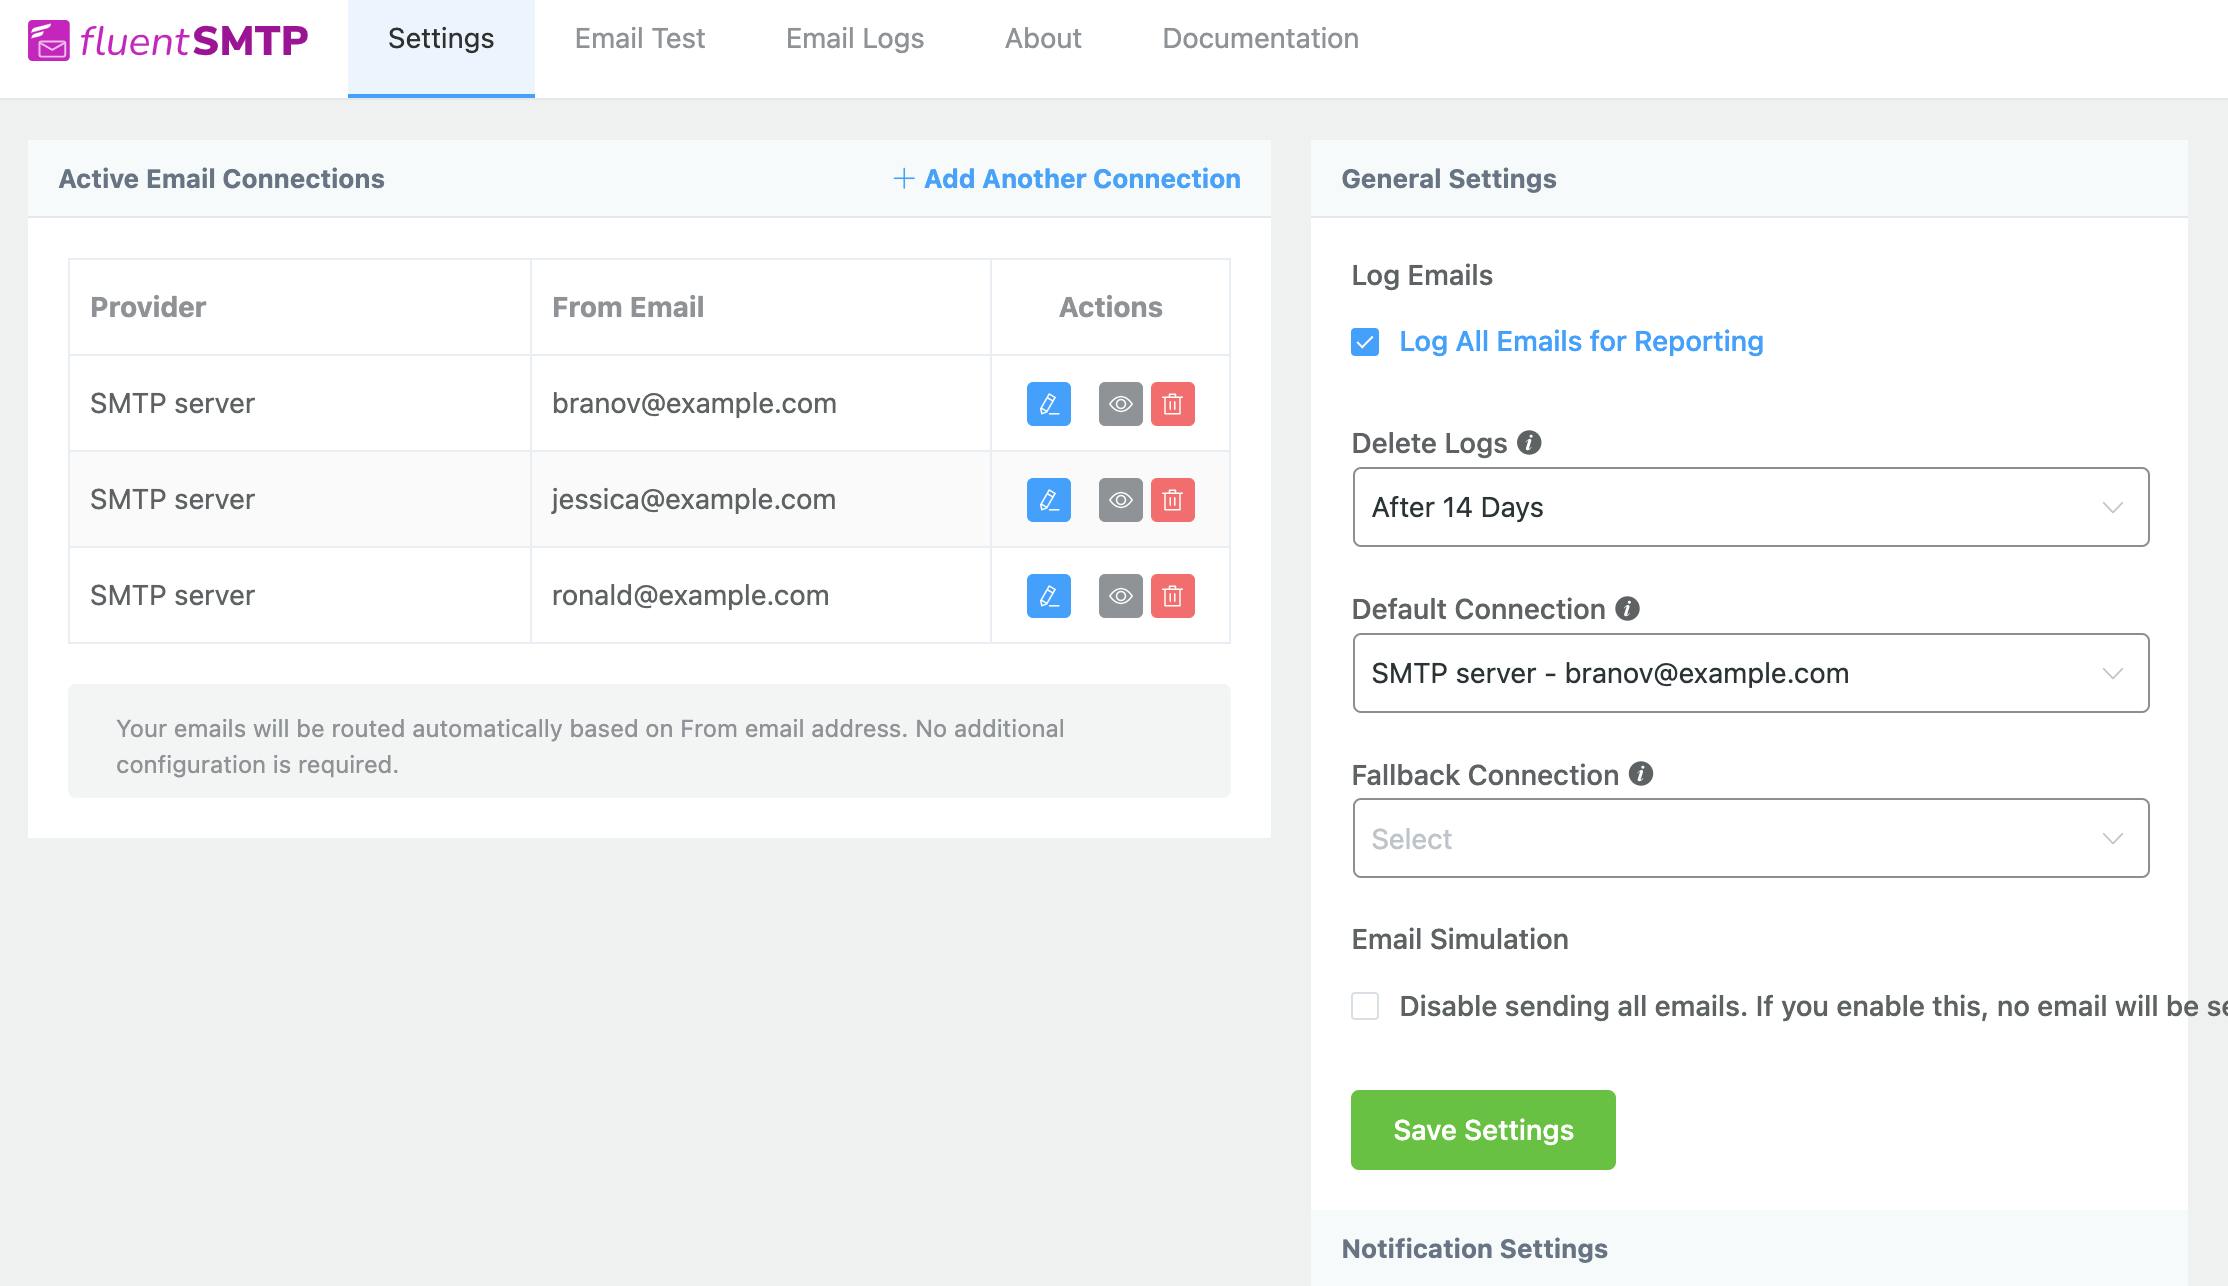
You will now see that the email account connection has been added.
Testing the connection
Once the email account connection has been made, you can now send test emails to see if everything is working as expected.
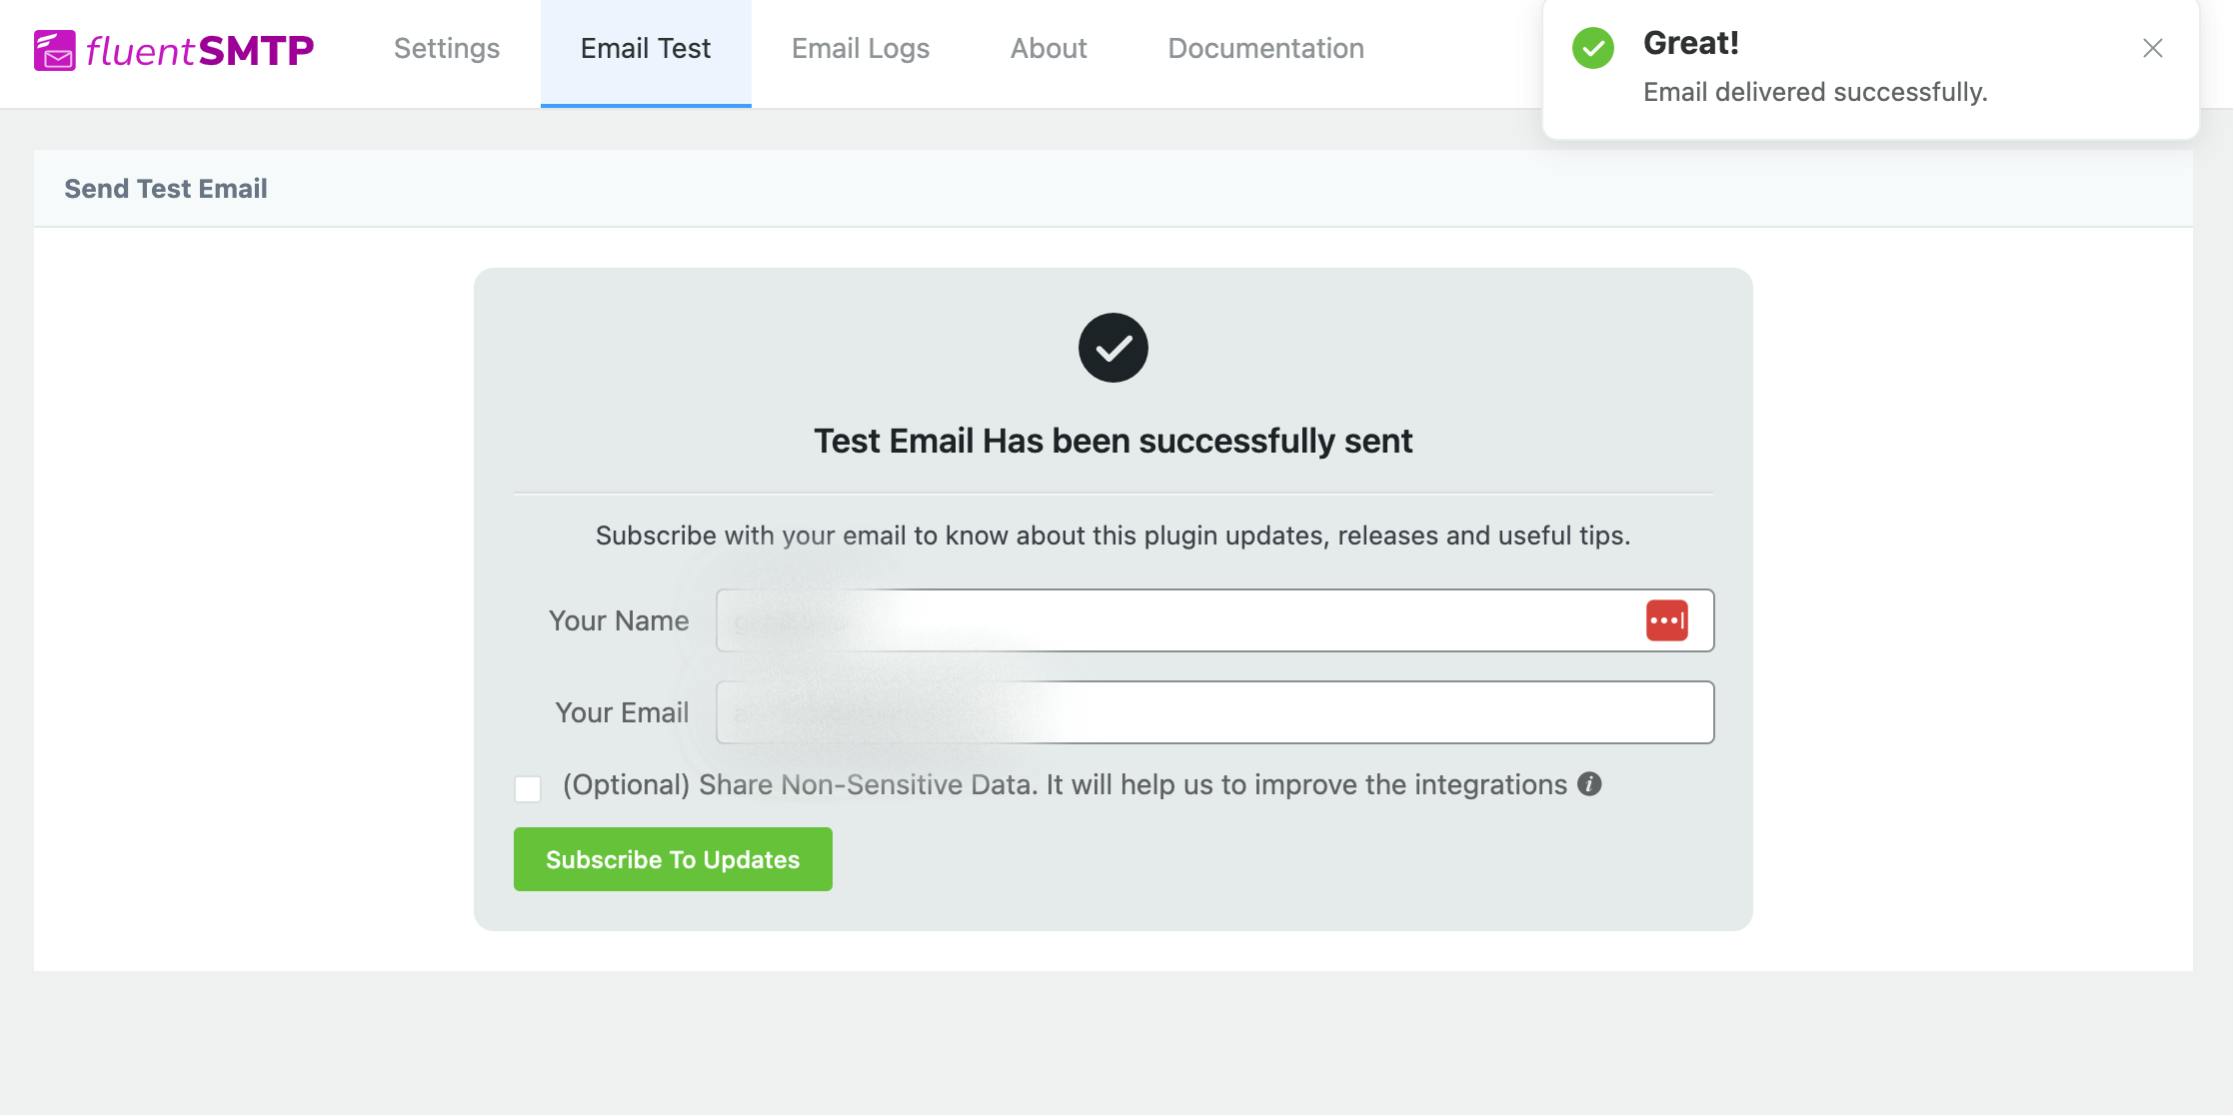
On the FluentSMTP menu above, navigate to Email Test, choose the From email you want (It can be more than one), enter the email you are sending to, and then click Send Test Email.
If the correct SMTP credentials are entered, the test email will be sent successfully to your desired entered email account. You can then check that email account to confirm if the email was indeed received.
Below is a preview of the received test email.
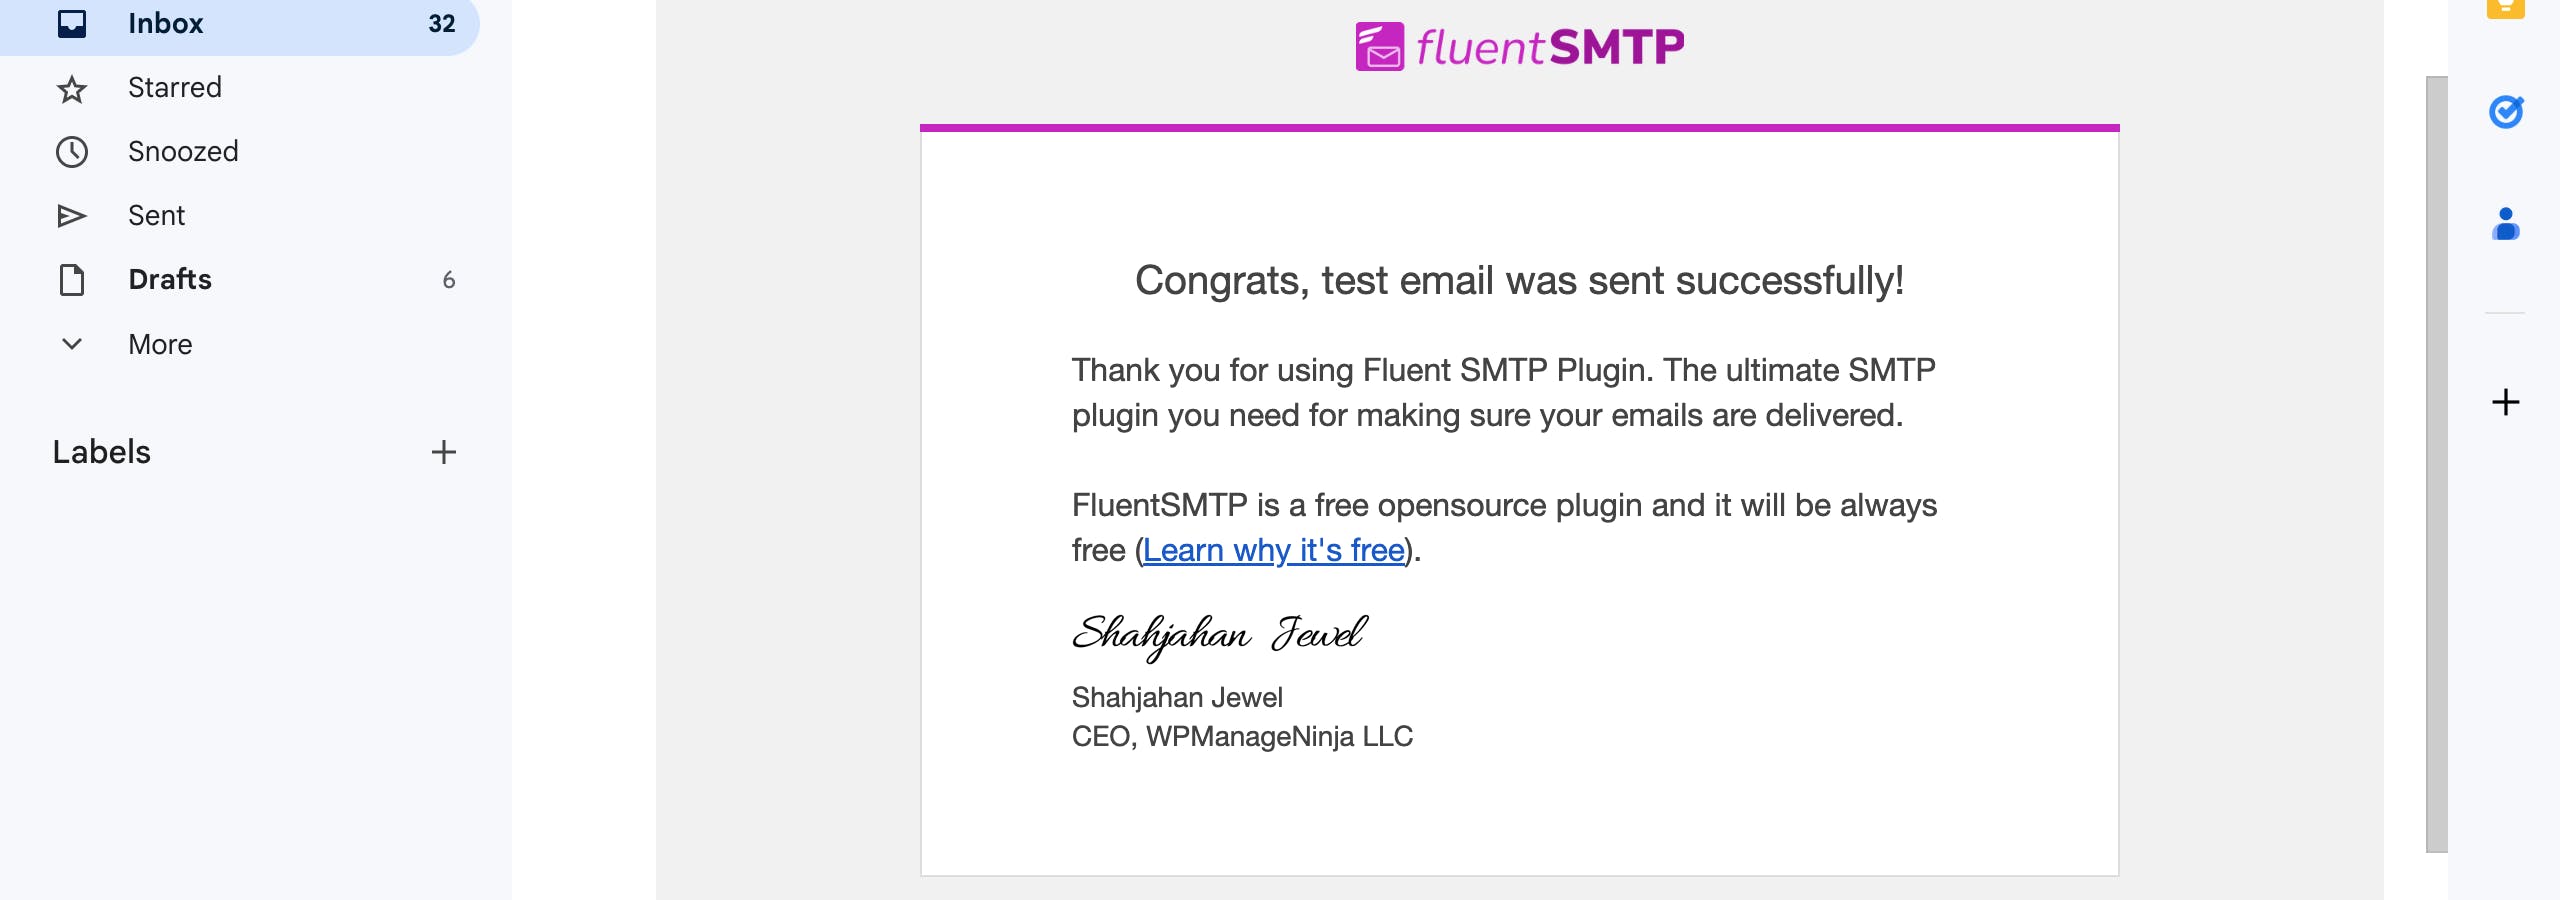
However, If the SMTP credentials were wrongly entered, your test email will fail. If this happens, you will need to re-check the SMTP credentials.

Connecting more than one sender email
To add another sender email, you simply need to follow the same process. Just click on + Add Another Connection to add a new sender email or connection.
You can also add multiple email account connections from different Email Service Providers.
Compatibility with different form plugins
FluentSMTP is compatible with quite a large number of form plugins which include the following:
Elementor Forms
Fluent Forms
Woocommerce Forms
Gravity Forms
Ninja Forms
Formidable Forms
And more...
You can visit FluentSMTP's site to view the full list of supported forms.
Conclusion
Most Email Service Providers (ESPs) still use the email account password as the SMTP password. However, a few have now reverted to application-specific passwords to improve email security.
Thank you for reading the article 🙌 I hope it makes your setup of FluentSMTP with Zoho a walk in the park. Enjoy the setup 🎉
Do you have any suggestions, comments, or questions? Write them in the comments section or reach out via Twitter DM.
Until then, see in you in the next article!